Ultimate Guide to Installing Your Peel and Stick Wallpaper Mural
A Detailed Step-by-Step Tutorial for DIY Wallpaper Installation
Before You Begin Your Wallpaper Project
Welcome! This is your comprehensive, easy-to-follow guide on how to install a self-adhesive wallpaper mural from Jass London. To ensure a successful DIY wallpaper installation, please carefully read all instructions before you start, whether you're a seasoned decorator or a first-time DIY enthusiast.
We highly recommend enlisting the help of a friend or partner. Having an extra pair of hands will significantly simplify the easy peel and stick wallpaper application process!
Crucial Pre-Installation Checks for Your Wallpaper Mural
Before you begin sticking your mural, take the time to thoroughly inspect it for any potential faults or errors. Carefully lay out all wallpaper panels on a clean floor and arrange them in the correct hanging sequence. If you've hired a professional, please ensure they also conduct this examination of all wallpaper rolls before scheduling the installation.
Double-check that all panels perfectly match in design, colours, and overall quality to ensure a seamless wallpaper mural hanging experience.
Important Note on Pre-Hanging Inspection: Examination of the wallpaper before it is applied to your wall is the buyer's responsibility. Once the mural has been adhered to your wall, your right to return may be voided. We cannot accept claims for defects that were apparent at the time of hanging after the wallcoverings have been cut and applied. Furthermore, we cannot be held liable for any costs incurred due to the installation or removal of the item.

Essential Equipment for Wallpaper Installation
To successfully hang your self-adhesive wallpaper, you'll need to gather a few key tools:
- Masking tape (for temporary positioning)
- A sharp pencil (for light markings)
- A high-quality box-cutter knife (for precise trimming)
- A clean, dry sponge or wallpaper smoother (for bubble-free application)
- And most importantly, a friend or partner to assist with the easy wallpaper hanging!
Preparing Your Walls for Peel and Stick Wallpaper
-
Preparing your walls
Proper wall preparation is crucial for achieving a flawless and long-lasting self-adhesive wallpaper application. Ensure your wall surface is:
- Clean: Free from any dirt, dust, and debris.
- Dry: Completely moisture-free.
- Smooth: Without any bumps or imperfections.
- Free of contaminants: This includes old backing paper, grease, mildew, ink stains, or anything that could hinder the adhesive from properly bonding.
- Safety First: Switch off the electricity mains and carefully remove any socket and switch covers.
- Remove Old Wallpaper: Take down any existing wallpaper and scrape away any loose paint.
-
- Smooth Imperfections: Sand down any rough areas or uneven surfaces until they are completely smooth.
- Clean Thoroughly: Wash the walls with warm water and a mild soap solution. Allow the walls to dry completely for a minimum of 24 hours.
- Uniform Colour Base: Ideally, the walls should be a light, uniform colour with no highly contrasting areas, as dark colours may potentially show through the new wallpaper.
- Priming Porous Surfaces: Highly absorbent surfaces like plaster or cement should be sealed with a PVA-based primer or emulsion paint. Allow this primer to dry out completely (typically 4-6 weeks for new plaster). This ensures proper wallpaper adhesion on plaster walls.
- Preparing Non-Porous Surfaces: For non-porous surfaces such as gloss paint or glass, simply wipe them clean. No further preparation is usually needed.
Important Note on Washable Paint: If your paint has a washable coating, it's essential to first prime the wall with a PVA-based primer or a regular emulsion paint and allow it to dry thoroughly before hanging self-adhesive wallpaper on painted walls. Always refer to the paint manufacturer's instructions for specific guidance.
Expert Tips for a Perfect Wallpaper Installation
-
Dealing with Plug Sockets and Light Switches:
Before starting to apply the wallpaper, we recommend unscrewing the base plates from all plug sockets and light switches. When you are applying a wallpaper strip over a socket or switch, carefully cut a small "x" shape directly over it. Gently pull the socket or switch through this "x" shape. Smooth the wallpaper onto the wall behind the switch or socket base plate. Finally, trim away any excess wallpaper around the opening and re-attach the baseplate for a seamless, professional finish around your wallpapered light switches.
-
Installing Wallpaper on Sloping Ceilings:
For walls with sloping ceilings, carefully hold up the first wallpaper strip (without removing the backing paper) so that the bottom edge is aligned with the floor or skirting board. Lightly fold the top of the strip to match the angle of the ceiling, creating a gentle crease. Lay the strip on the floor and use a sharp knife or scissors to trim away the excess wallpaper along the crease, leaving at least a 10 cm margin above the fold. This technique ensures a neat finish when hanging wallpaper on angled walls.
Step-by-Step Guide to Applying Your Self-Adhesive Wallpaper Mural
Step 1: Unpacking and Organizing Your Mural Wallpaper Panels
-
Step 1: Lay out your mural wallpaper
Carefully unroll the wallpaper and separate each individual drop or panel. Identify the hanging order marked on each panel and arrange them on a clean floor in the correct sequence. This crucial step allows you to preview the complete image and ensure a perfect pattern match before you begin the wallpaper mural application.
Please note: If you have ordered multiple murals, the panels for each mural may be rolled together separately.
-

Step 2: Precisely Positioning the First Wallpaper Strip
-
Step 2: Position the first strip
Without peeling off the backing paper, carefully position the first wallpaper strip squarely against the top left corner of your prepared wall.
Use a piece of masking tape to secure the entire width of the strip, approximately 30cm from the top, holding it temporarily in place. Double-check that the strip is perfectly vertical along the left edge and aligned with the floor or skirting board.
Once you're satisfied with the positioning, allow the top portion of the strip to hang down over the masking tape and gently peel away the backing paper from this top section. Use scissors to trim away the exposed backing paper.
-

Step 3: Applying the First Self-Adhesive Wallpaper Panel
-
Starting from the fold at the masking tape, use a squeegee or a clean, dry sponge to smooth the wallpaper downwards onto the wall. Apply even pressure to avoid air bubbles. Once the top section is adhered, remove the masking tape and gently continue peeling the backing paper downwards, keeping the panel in close contact with the wall and smoothing as you go. We strongly recommend having a second person assist you during this stage to ensure proper alignment and a smooth, bubble-free wallpaper installation.
Step 4: Seamlessly Butting Up Subsequent Wallpaper Panels
-
Step 4: Butt up the panels
When hanging multiple wallpaper drops, align the edges of each panel directly next to the previously applied panel, creating a butt joint (there should be no overlap). Visually match the design across the seam on the wall and gently press the panels together so that the join becomes virtually invisible. Immediately smooth out any air bubbles that may appear using a squeegee or a soft cloth, working from the center outwards. This "butt join" technique is key for a professional-looking wallpaper mural without visible seams.
Continue carefully removing the remaining backing paper and smoothing the mural onto the wall as you progress until the entire drop is fully installed.
-

Step 5: Completing the Wallpaper Mural Installation
-
Repeat the previous steps for each remaining wallpaper drop until all panels of your mural are installed. Remember that panels should not overlap. If you happen to make a mistake or trap any large air bubbles, you can carefully unstick the affected section and reposition it as needed while the adhesive is still workable.
Once your entire wallpaper mural is installed, use a sharp knife and a straight edge (like a metal ruler) to carefully trim away any excess wallpaper from the sides, top, and bottom edges for a clean finish.
An essential final step is to firmly smooth down the entire surface of the installed mural using a soft cloth. This helps to remove any remaining small air bubbles and ensures the mural properly bonds to the wall for long-lasting enjoyment.
-

Wallpaper Drying Instructions
Repeat the previous steps for each remaining wallpaper drop until all panels of your mural are installed. Remember that panels should not overlap. If you happen to make a mistake or trap any large air bubbles, you can carefully unstick the affected section and reposition it as needed while the adhesive is still workable.
Once your entire wallpaper mural is installed, use a sharp knife and a straight edge (like a metal ruler) to carefully trim away any excess wallpaper from the sides, top, and bottom edges for a clean finish.
An essential final step is to firmly smooth down the entire surface of the installed mural using a soft cloth. This helps to remove any remaining small air bubbles and ensures the mural properly bonds to the wall for long-lasting enjoyment.
Congratulations on Your Newly Transformed Space!
You've successfully completed your DIY wallpaper project! Step back, admire your work, and enjoy your stunning new self-adhesive wallpaper mural!
Enhance Your Comfort: Browse Our Luxurious Silk Pillowcases
-
Emerald Mulberry Silk Pillowcase
Regular price £39.95Regular priceUnit price / per£39.95Sale price £39.95 -
Floral Pattern Mulberry Silk Pillowcase
Regular price £49.95Regular priceUnit price / per -
Multicolor Mulberry Silk Pillowcase
Regular price £39.95Regular priceUnit price / per£39.95Sale price £39.95 -
Orange Natural Mulberry Silk Pillowcase
Regular price £39.95Regular priceUnit price / per£39.95Sale price £39.95 -
Wine Red Mulberry Silk Pillowcase
Regular price £39.95Regular priceUnit price / per£39.95Sale price £39.95 -
Cameo Pink Mulberry Silk Pillowcase
Regular price £39.95Regular priceUnit price / per£39.95Sale price £39.95 -
Pink Mulberry Silk Pillowcase
Regular price £39.95Regular priceUnit price / per£39.95Sale price £39.95 -
Animal Print Leopard Mulberry Silk Pillowcase
Regular price £49.95Regular priceUnit price / per -
Teal Blue Mulberry Silk Pillowcase
Regular price £39.95Regular priceUnit price / per£39.95Sale price £39.95 -
Tropical Vibes Mulberry Silk Pillowcase
Regular price £49.95Regular priceUnit price / per -
Sea Blue Natural Mulberry Silk Pillowcase
Regular price £39.95Regular priceUnit price / per£39.95Sale price £39.95 -
Silver Grey Natural Silk Cushion Cover
Regular price £39.95Regular priceUnit price / per -
Black Natural Silk Cushion Cover
Regular price £39.95Regular priceUnit price / per -
Pink Natural Silk Cushion Cover
Regular price £39.95Regular priceUnit price / per -
Silver Blossoms Mulberry Silk Pillowcase
Regular price £49.95Regular priceUnit price / per -
Abstract Underwater Mulberry Silk Pillowcase
Regular price £49.95Regular priceUnit price / per -
Pink Dreams Mulberry Silk Pillowcase
Regular price £49.95Regular priceUnit price / per -
Dark Blue Mulberry Silk Pillowcase
Regular price £39.95Regular priceUnit price / per£39.95Sale price £39.95 -
Silver Grey Mulberry Silk Pillowcase
Regular price £39.95Regular priceUnit price / per£39.95Sale price £39.95 -
Vintage Rose Mulberry Silk Pillowcase
Regular price £49.95Regular priceUnit price / per -
Floral Field Mulberry Silk Pillowcase
Regular price £49.95Regular priceUnit price / per -
Tiny Rose Floral Mulberry Silk Pillowcase
Regular price £49.95Regular priceUnit price / per -
Cameo Pink Natural Silk Cushion Cover
Regular price £39.95Regular priceUnit price / per -
Royal Blue Mulberry Silk Pillowcase
Regular price £39.95Regular priceUnit price / per£39.95Sale price £39.95 -
 Sold out
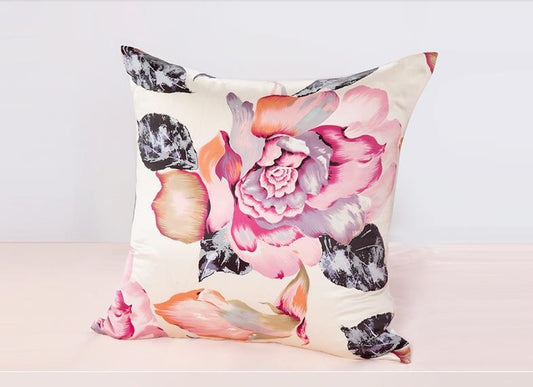
Roses Natural Silk Cushion Cover
Regular price £39.95Regular priceUnit price / per


